
What the grit number means
Grit is how coarse the sandpaper is, and the number counts the size of the abrasive particles stuck to the paper. Low numbers are coarse: a 40-grit disc is covered in big, sharp grains that tear material off fast. High numbers are fine: a 240-grit disc has tiny grains that barely scratch the surface. So the rule to hold onto is backwards from what people expect — the higher the number, the smoother the finish and the less it removes.
You’ll sometimes see the number with a P in front, like P80 or P120, and that P is not decoration. It marks the FEPA scale, set by the European abrasives federation and the basis of the ISO standard — and it’s what most sandpaper sold here carries. A plain number with no P is the older American CAMI scale. They are two different rulers.
Through the coarse and middle grades they track each other closely enough that P80 and 80 will behave much the same on a board. Above roughly 220 they drift apart by about a grade, so P320 and 320 are not the same paper. The numbers in this guide are the ones you’ll see on the shelf; if your pack carries a P, read them as P numbers and you’ll be right.
Coarse first, fine last — the grit ladder
Sanding works as a ladder of grits. You start coarse to shape the surface and knock down the rough, then climb through the grades, each one rubbing out the scratches the last one left. By the time you reach the fine grits there’s almost nothing left to remove — you’re just polishing out the marks.
The one mistake that wastes a whole afternoon is skipping grades. Jump straight from 40 to 180 and the fine paper can’t erase the deep scratches the coarse paper dug in — you’ll see them the moment a coat of stain goes on. The safe habit is to never skip more than one grade: 40, 80, 120, 180 climbs cleanly. Note that 40 to 80 is the biggest jump on that ladder, since it doubles the particle size. On softwood, which dents and loads up more easily than hardwood, it’s worth putting 60 in between.
Match the grit to the job
Most jobs only need three or four grits, and which ones depend on where you’re starting.
- 40 to 60 grit — the heavy stuff. Stripping old paint or varnish, levelling a glued-up panel (boards glued edge-to-edge into a wider board), taking the weather-grey off decking. It removes fast and leaves a rough surface you’ll refine later. One hard stop before you start: if the house went up before 1970, assume the old paint contains lead until a test says otherwise. Dry sanding it is the worst thing you can do — it throws lead dust through the whole work area. Test first, and if it is lead, read up on the rules for handling it rather than reaching for a sander.
- 80 to 120 grit — the workhorse range for bare timber. This is where you shape edges, take out saw marks and get a board flat and even. For a lot of rough carpentry, 120 is as far as you need to go.
- 150 to 180 grit — the finish for timber you’re about to paint or oil. Smooth to the hand, but still just rough enough for the coating to grip. This is also where you stop if you’re staining. Sand bare timber much finer than this and you burnish the surface closed, the stain can’t soak in evenly, and softwoods like pine come out blotchy. Finer is not better before a stain.
- 240 grit and up — between coats. A light rub with 240 knocks the little raised bumps off dried paint or varnish so the next coat lies flat. By this stage you’re not sanding the wood at all — just smoothing the dried paint or varnish itself.
Bare metal and rust sit lower on the ladder: 40 to 80 to cut back rust and old paint, then 120 if you’re painting over it. There’s no point chasing a furniture finish on a bracket.
One thing the grade won’t save you from: on bare timber, sand along the grain. Scratches that run across it cut through the fibres, and they turn up dark and obvious the moment a finish goes on. It’s the same failure as skipping a grade, from a different cause. A random-orbital’s wandering pattern hides this better than a belt sander or a sanding block does, but it doesn’t make it disappear — work along the board on your finishing passes.
The abrasive matters as much as the number
Two discs can both say 80 grit and behave nothing alike, because the grain glued to them is different. It’s worth knowing the three you’ll meet:
- Aluminium oxide — the standard, and what most timber sanding discs use. Good all-rounder at a fair price. The grain fractures under pressure instead of going smooth, so fresh edges keep cutting as it wears.
- Zirconia (zirconia alumina) — a tougher grain that stays sharp longer and cuts faster. It’s the pick when there’s a lot of material to remove, and the pick for metal. A cheaper disc goes blunt on steel and starts skating across the surface, polishing it instead of cutting.
- Silicon carbide — hard and brittle, and the one for very fine work: smoothing plastic, filler, or a cured finish between coats. It’s the black wet-and-dry paper, so called because you can use it with water. Wetting the paper floats the dust away and stops it clogging, which is why it’s the choice for finishes rather than bare timber. Keep it to hand-sanding — water and a mains-powered sander do not mix.
For general work around the house, aluminium oxide covers it. Step up to zirconia only when there’s a lot to grind off or you’re sanding steel.
Backing and dust: hook-and-loop and the holes that matter
Discs fasten to a random-orbital’s pad with hook-and-loop, the fabric fastener sold under the Velcro name. The part worth checking before you buy is the hole pattern. Those holes are the dust path: the sander draws dust down through the disc and into its own extraction. If they don’t line up with the holes on your pad, the disc still sands. But it drops its dust back onto the surface and loads up much faster. Our sanding disc roundup covers the hole layouts and the mesh-backed sets in detail.
The dust is the real hazard
Sanding looks harmless, and of all the power-tool jobs it’s the one most people do without a mask. That’s the one to change. The fine dust a sander throws hangs in the air long after you’ve switched off, and you breathe it in through your nose and throat. Cancer Council notes that wood dust is a Group 1 carcinogen. That’s the classification the International Agency for Research on Cancer uses for things proven to cause cancer in people. Prolonged exposure is linked to cancers of the nasal cavity, sinuses and nasopharynx, and to leukaemia. Finer hardwood dust is the easiest to breathe in.
None of that means you stop sanding — it means you keep the dust out of the air. Run the sander’s dust box, or better, a hose to a vacuum. Work in a breeze or with the roller door open. And wear a mask rated for fine dust — a cheap paper one lets it straight through. Our dust mask and respirator guide covers which rating seals sanding dust out.
How to stock the drawer
A home shed gets by on a short list. A spread of 80, 120 and 180 in aluminium oxide handles nearly everything in timber, plus a small pack of 240 for going between coats of paint. Add some 40 or 60 only if you’ve got stripping or decking ahead. Buy them in the size your sander takes — 125mm is the common one — and check the hole pattern matches before you commit to a big pack.
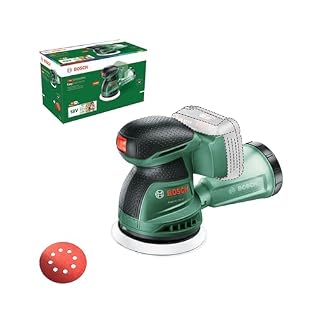
The sander itself matters less than most people think, because the disc does the work. Put a fresh disc in the right grade on an entry-level random-orbital like the Bosch EasyOrbit we reviewed and it will out-finish an expensive sander running a worn-out one. A worn disc is the most common reason a sander seems gutless, so change it sooner than feels necessary.